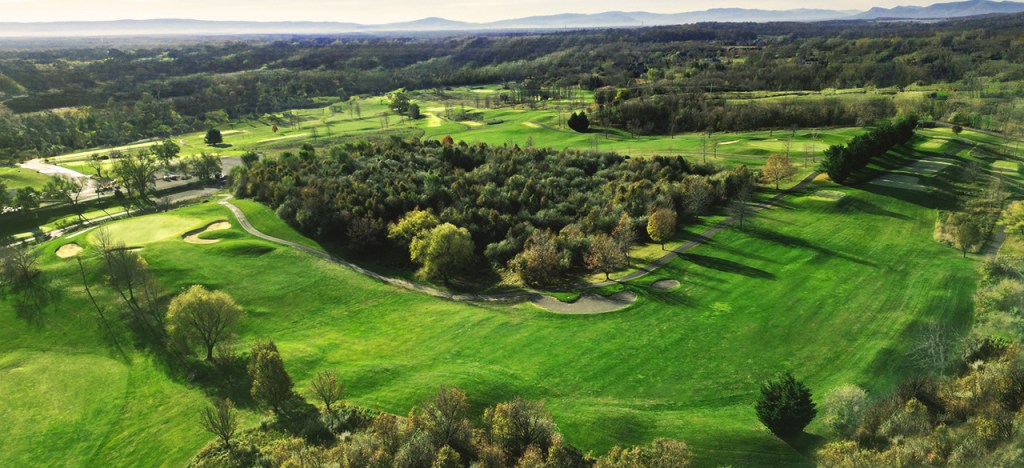
The Rock Course was the first of the two courses open for play. The Rock has two iconic holes that will delight you when first seen. Number 7 the famous island green and Number 17 the beautiful heart green. The Rock is a treat you will long remember and look forward to playing time after time.
Rock Course Virtual Tour
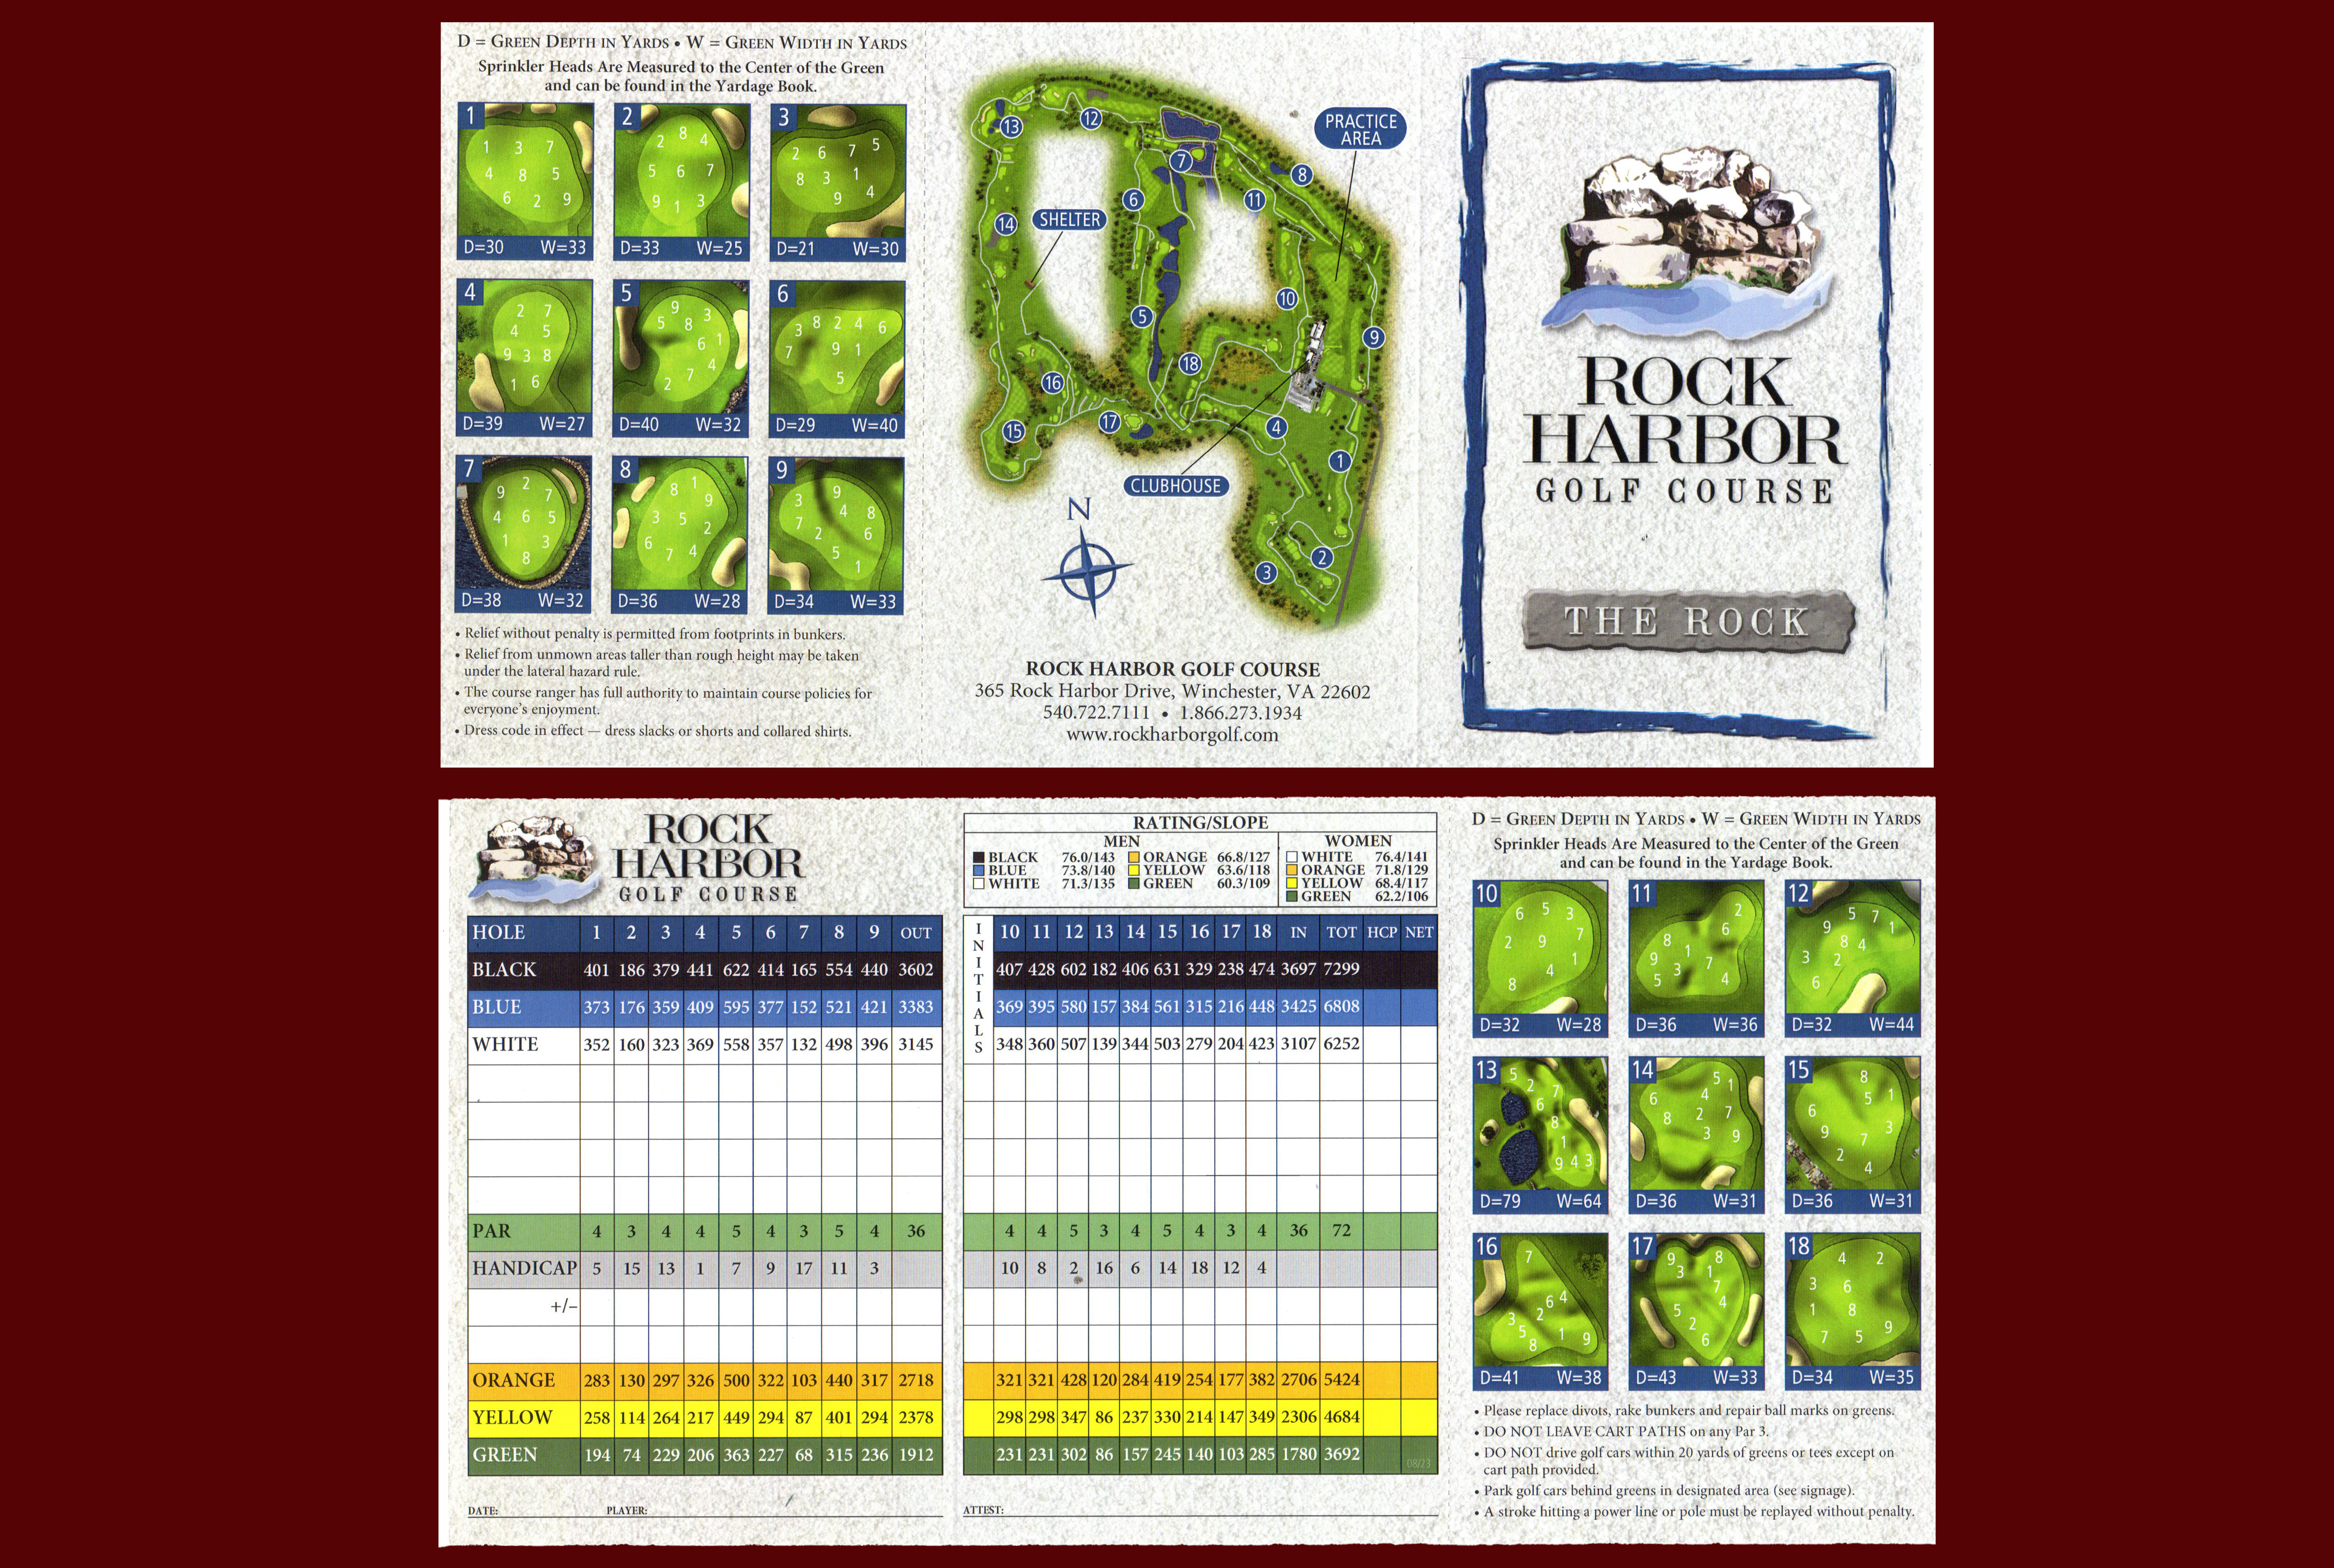
Rock Score Card
Rock 1 – Par 4
Rock 1 is a great starting hole and played well could offer up birdie first thing in the round. A medium length par 4 is flat, straight away and wide open. A fairway bunker on the right will catch an errant shot to the right and a tree on the left front guards the approach to this green. A large flat green invites you to attack the pin location anywhere on this green.
Rock – Par 3
Rock 2, a par 3, is straight away with bunkers long left and right. This is a deep green so proper club selection is a must. This green surface offers some subtle breaks so take a second look before making your putt.
Rock 3 – Par 4
Rock 3 is a short dog leg right that could offer up another chance at birdie for a well-placed tee shot in the middle of the fairway. The dog leg is guarded by a fairway bunker and a stand of trees. The green is fronted by a bunker with another that will catch a shot that goes a bit long. If the pin is in the middle or left side of the green go for it. In the back or right just play to the middle and take the 2-putt.
Rock 4 – Par 4
Rock 4 is a slight dog leg left that plays long all up hill to an elevated 2 tiered green. Study this tee shot because a straight shot over the corner will land you in the middle. A shot to what appears to be the middle of the fairway my wander off into the rough. For your second shot pay attention to the pin location. A back pin will require an extra club. The green is guarded by a deep bunker in the front and on the left, avoid these at all costs if possible. Rock 4 is the number 1 handicap on the course. It looks harmless enough, but it can really mess up a scorecard.
Rock 5 – Par 5
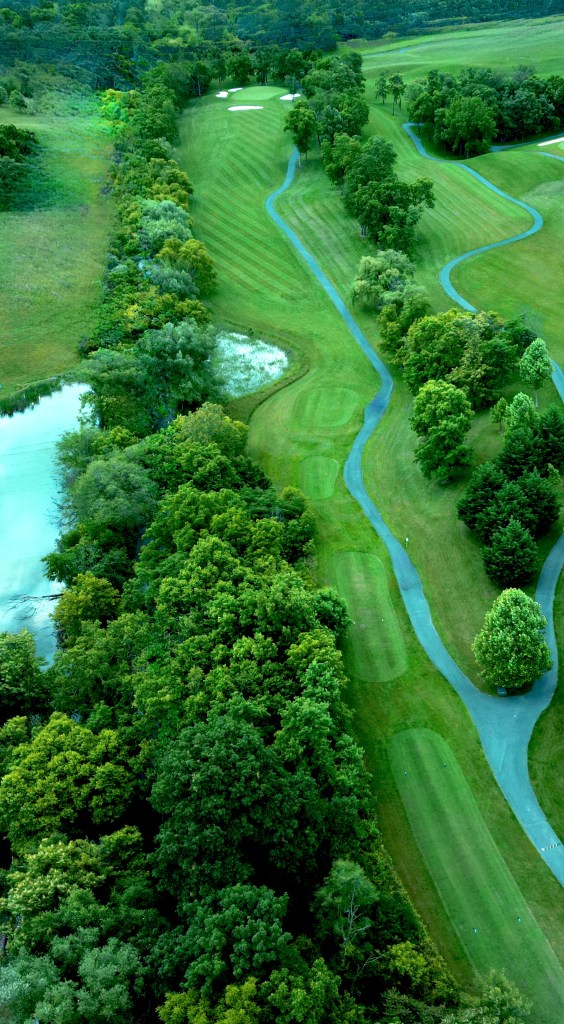
Rock 5 starts from an elevated tee with a shot over a water hazard that runs parallel to the right side of the fairway. Take on as much as you choose to get to the short grass. Staying left of the sycamore tree is the recommendation. The second shot is a lay-up but stay left of center to be able to approach this large green from the best angle. Water and bunkers guard this green well.

Rock 6 – Par 4
Rock 6 is a short par 4 dog leg left that plays to an elevated green. Placement of the tee shot is critical on this hole. The best play is to hug the left side for the best approach angle. A tee shot to the right or through the fairway will leave the approach shot blocked by greenside trees and a deep bunker on the right. There is a steep bank behind this green so attacking back and right pin placements has added risk.
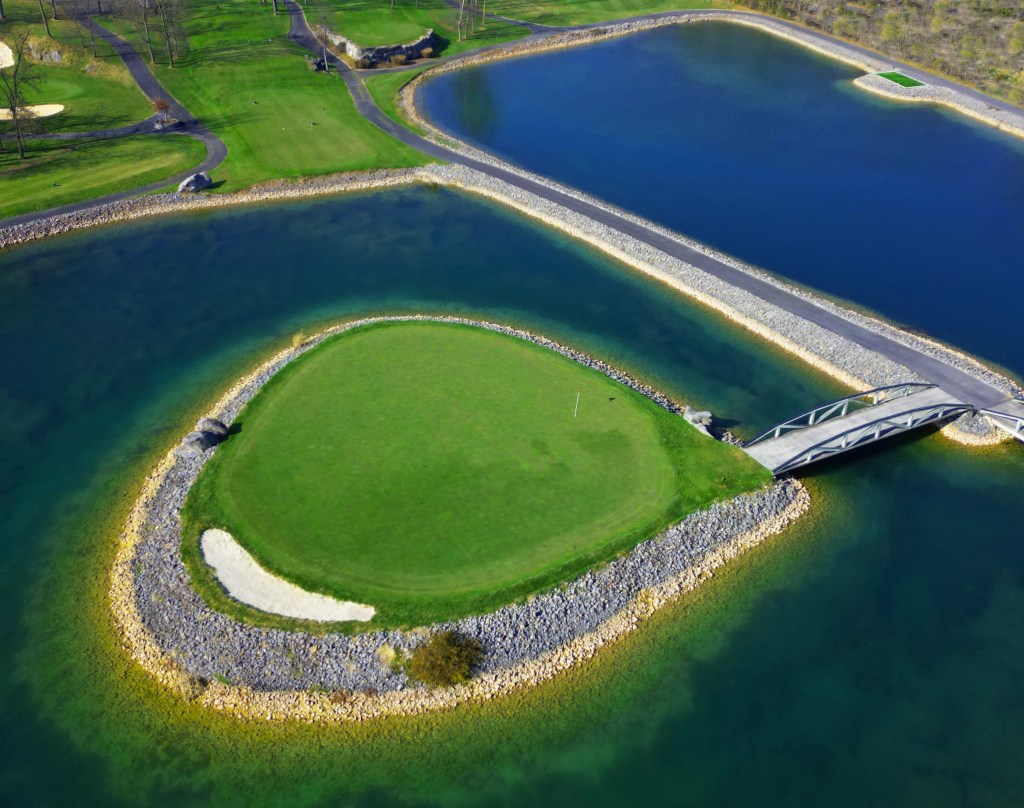
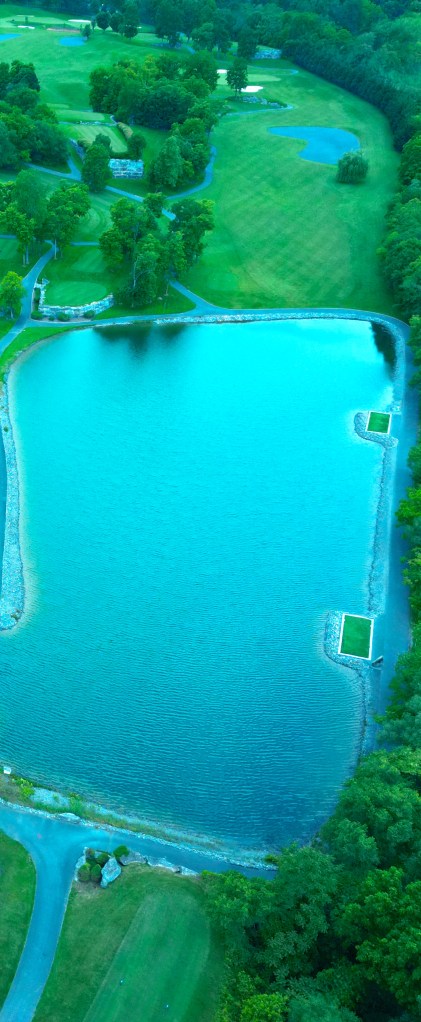
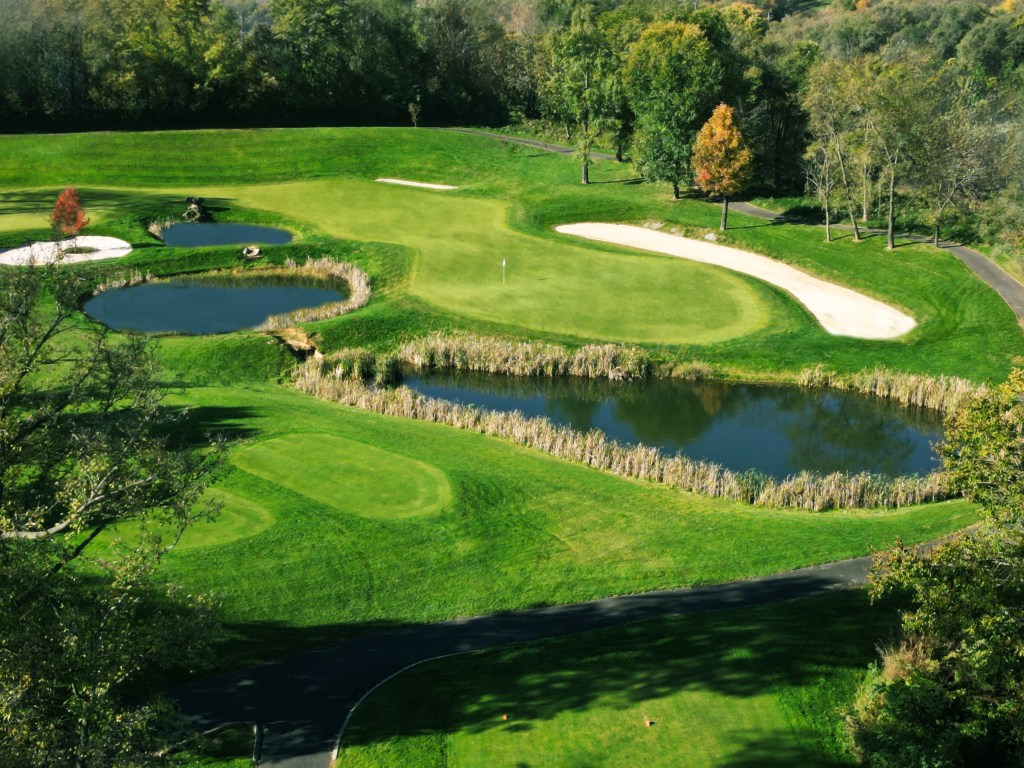
Rock 7 – Par 3
Rock 7 is a beautiful island that sits in the middle of our largest pond. The green gently slopes from back to front and is very receptive to a short iron. The pin placements around the edges of this green may look inviting but if you are off just a smidge… well at least the drop area is on the island. Number 7 is one of the signature holes on The Rock that will bring you back time and again.
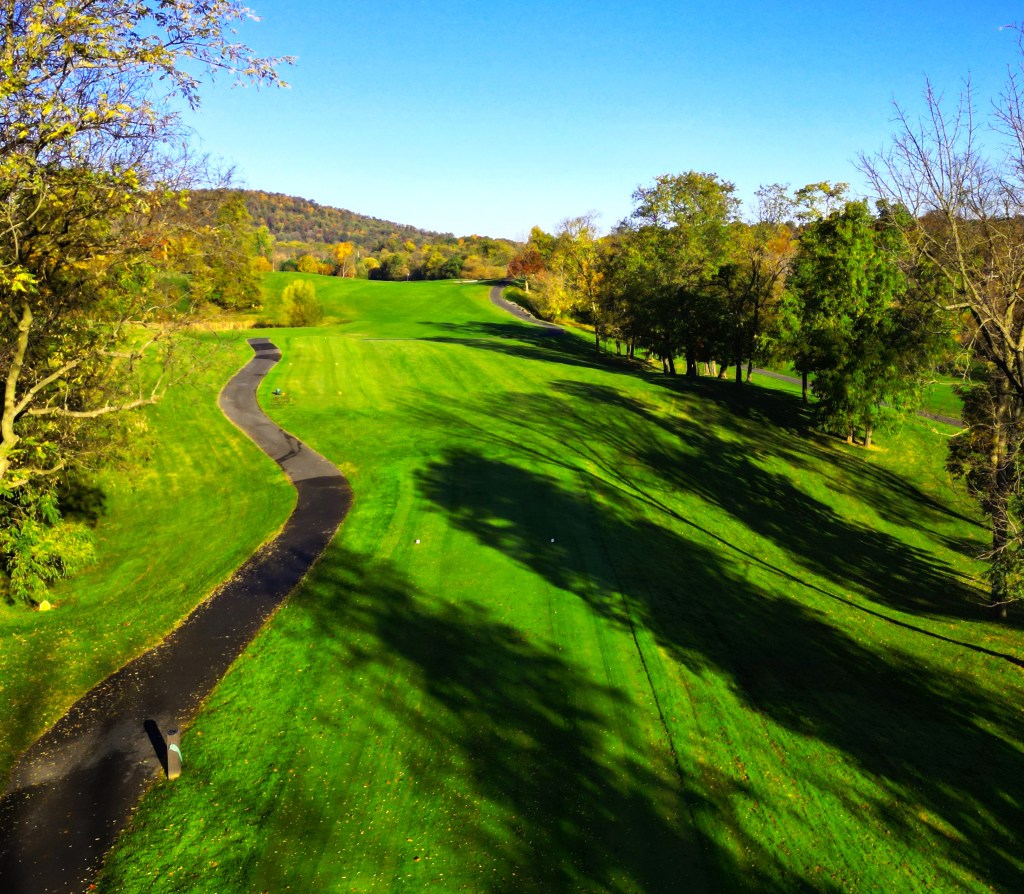
Rock 8 – Par 5
Rock 8 is what you see is what you get. A comparably short par 5 that plays straight away. If you can land the tee shot near the base of the hill you have a chance to go for two. This is a blind shot so take a ride to the top of the hill to make sure the green is clear and pick your target. There is out of bounds on the entire left side of this hole so plan your approach with that in mind. There is a fairway bunker on the left side of the fairway about 80 yards short of the green. The green itself is guarded by bunkers left, right and in the back. This hole will offer some birdies, some bogies and a few of the dreaded “others”.
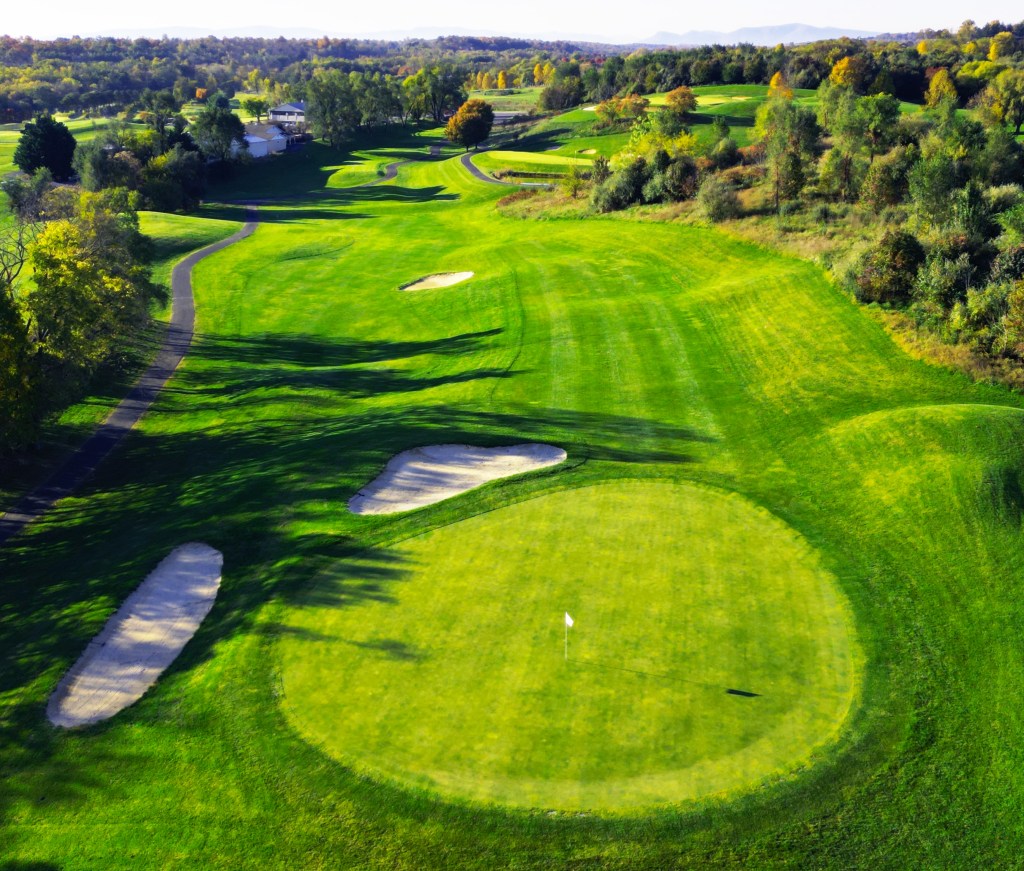
Rock 9 – Par 4
Rock 9 is a long straight hole that plays to a slightly elevated two tiered green. A good drive down the right center of the fairway will set up your approach. The green is guarded by a deep bunker in the front left and another in the back. As stated, there are two levels on this green and the chance for birdie requires the approach to be on the proper level.

Rock 10 – Par 4
Rock 10 has a split fairway divided by a ridge the runs the center of the fairway with a bunker in the center. The left side is narrow but offers a better look at the green. The approach from the right side will be a bit more of a challenge to get up and down as it is a blind uphill shot. There is a bunker in the front and another cut in the hill should you roll off to the right. This is a large flat green that offers a birdie opportunity if your approach is close.
Rock 11 – Par 4
When you stand on the tee at Rock 11 you are faced with a narrow landing area bordered by a pond on the left and a very steep slope on the right…. you have a decision to make. If you trust your driver, go up the middle for a short iron to the green. To take the slope and the pond out of play, lay up with an iron and play a longer shot to the green. The fairway bunker on the right is obvious but there is also a bunker that guards the front left of the green you may not see from the fairway. Again, slightly up-hill so you may want to grab 1 more club.
Rock 12 – Par 5
Rock 12 is one of the most pleasing holes to the eye on the course. This long par 5 plays straight away over our largest pond. If you are playing the back tees the carry is about 220 so, get it all! From the landing area your second shot should be just short of the rock break that crosses the fairway but left of the waste bunker. If you are feeling lucky the “perfect” second shot is just right of the rock break and over the waste bunker, but that’s a small target. This hole features a huge green with a bowl in the middle, which is good news if the pin is in the bowl. If the pin is anywhere on the edge, hang on. Guarded in the front by a deep bunker, and the back by another, it is best to just go for the bowl and try to 2-putt.
Rock 13 – Longest Par 3
Rock 13 will play as short as 90 yards or as long as 200 yards depending on the pin location and the tee box chosen. 3 small ponds protect the front and left of this very deep green. Sand bunkers are placed in the back of the green… long is not an option. This is a stunningly beautiful hole that will be a vexing challenge each time you play it.
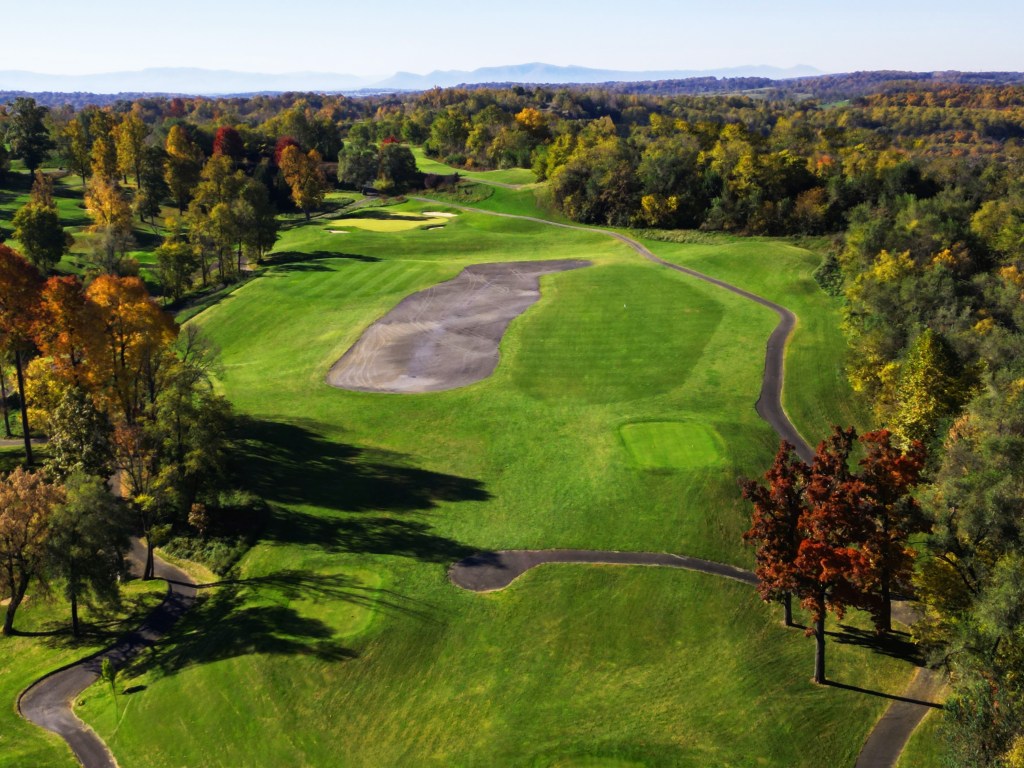
Rock 14 – Par 4
Rock 14 plays just slightly up-hill which shields your view of a large waste bunker that is located in the middle of the fairway. You will see directional flags on both the right and left of your view, pick one of these as your target. Whichever choice you make will leave a mid-iron into this tricky sloping green. Bunkers protect the front and the sides, so give yourself enough club to land in the middle of this green.
Rock 15 – Par 5
No matter the tee you choose to play, you will need a shot down the middle to get off to a good start. At this point there is a decision to make. You could choose to risk the boulder field (left side) which is the shortest distance to the green and may get you there in two or play the safe shot down the right side and have a short wedge into a very receptive green. You must know your game well but there are low scores to be had, however large numbers are also possible. Good luck!!
Rock 16 – Par 4
Rock 16 is a great risk/reward hole. Driving this green is certainly possible, but you must carry the shot on to the center of the green. The carry itself is over an area of wilderness no ball has ever returned from. Short of the middle of the green you will find a false front that will repel your ball 50 yards down a severe slope. For the less adventurous the shot is down the right side of the hole in the fairway, leaving a short iron to a green that slopes right to left at this angle. The green is multi-tiered and is a roller coaster of abrupt breaks. Be careful with speed because you can easily putt yourself off this surface.
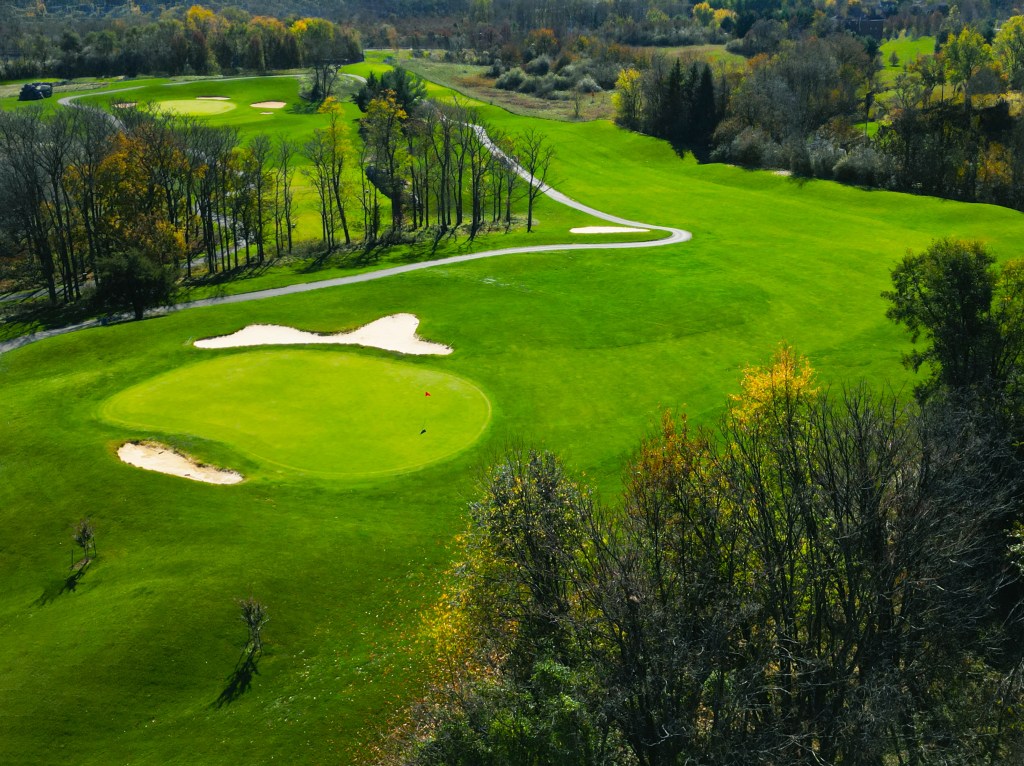
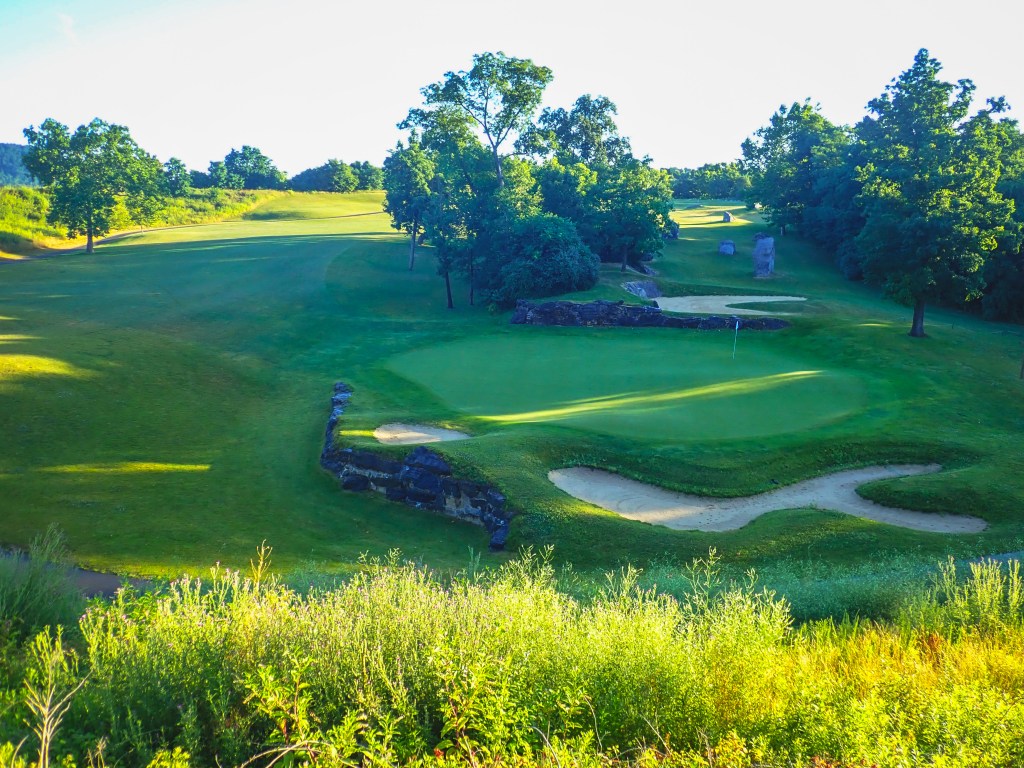
Rock 17 – Par 3
Rock 17, with its uniquely heart shaped green is one of the course’s signature holes you will long remember. The green is surrounded by bunkers and has a ridge that runs from back left to front right that separates the upper and lower tier. Between the elevation change and the wind that is generally present club selection needs to be carefully considered.
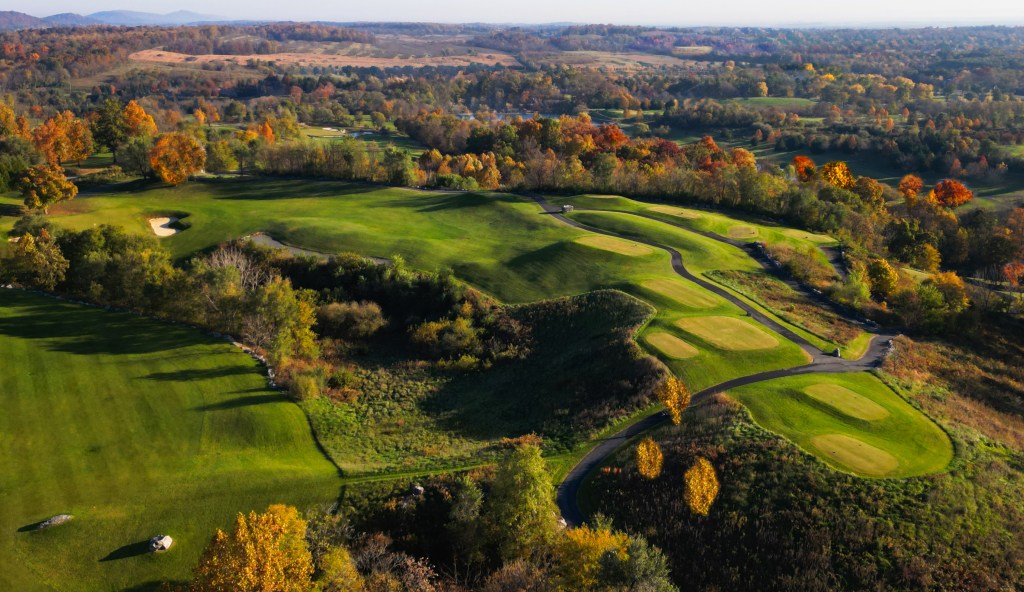
Rock 18 – Par 4
Rock 18 is a great finishing hole. A 90-degree dog leg right requires some shot making. Big hitters may consider cutting the corner but do that with caution as you are playing over a natural area that is out of bounds. The best play is down the middle just short of the mounds which are visible at the end of the fairway. Then you have a long iron to an elevated green, guarded in the front both right and left by large bunkers. There is trouble long as well with two deep bunkers that will catch most shots rolling through the green. If you can get on in regulation there is a chance for birdie.